Note: The tutorial is in need of a rewrite to adjust it to a menu reorganization of the Windows program. But it should not be that hard to find the mentioned commands in the new menus.
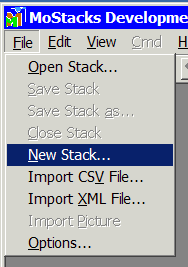
Use the function New Stack... in menu File or the New Stack icon in the button bar to start a new stack:
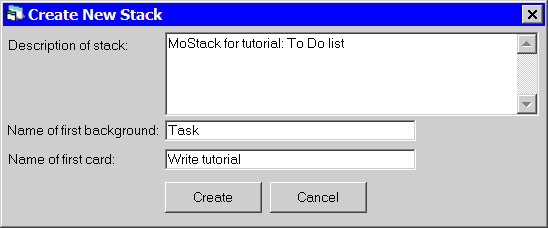
The window Create New Stack appears, where you enter a description for the stack (not that important), the name of the first background (you should use Task because the name of the background will be used many times in this tutorial), and the name of the first card that MoStacks will automatically create (not very important):
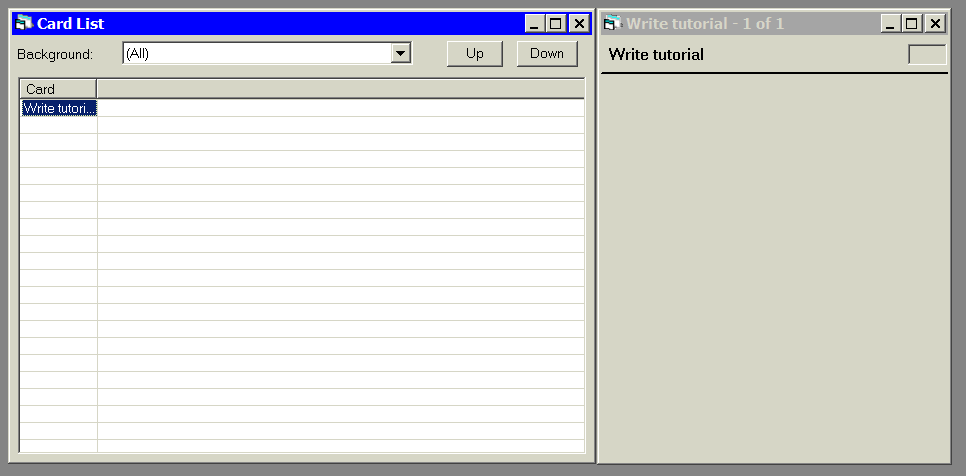
After you click the Create button the new stack is displayed, in the two standard windows, i.e. the Card List window to the left, showing one entry in the list for the first card, and the window with the Card View, showing the first card in detail. Because the background Task does not yet contain any fields or controls, the Card View still looks rather empty:
Now we proceed to Step 2: Define Fields.